


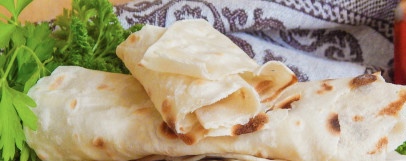
Lavash is usually called unleavened white bread made from wheat flour, which has the shape of a thin flat cake. This bread is widespread for the most part among the peoples of the Caucasus, Afghanistan and Iran, as well as in other regions of Asia Minor.
Today it is rather difficult to overestimate the popularity of this bread in modern cuisine. Increasingly, it is used not only as bread, but also as a versatile product in the preparation of puff pies, rolls, quick snacks, and even, remarkably, lasagna.
It should be noted that there are a lot of recipes for this bread at home, but I want to suggest you start with the simplest thing - let's make thin pita bread without yeast. I suggest baking pita bread in a pan - I got 8 pieces.
Do not be intimidated by such a seemingly considerable number of steps - I deliberately did so much so that everything would work out as well as possible the first time. I really hope that this recipe for simple delicious bread will come in handy!
Sign up to receive email updates on new recipes.
FoodNerdy is a powerful platform to manage and keep your recipes You do not need any experience in web development, It is very easy to use and customize
Some example text some example text. John Doe is an architect and engineer
.jpg)


