Tag

making

Browsing

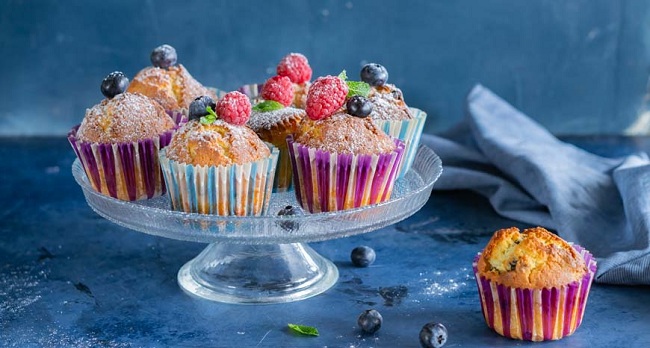
Classic muffin is an airy and soft dessert with the addition of dried fruits and decorated with icing and sprinkles. It can be large or small, cooked in the oven or right in the mug. How to make a treat perfect, read my selection of recommendations.

  1. When choosing products for baking, give preference to natural ingredients.
  2. Before preparing the classic raisin muffins, take out all the ingredients of the recipe on the table – they should be at natural temperature.
  3. Always pass flour through a sieve. From this, the baked goods become weightless and rise well. The silicone mold is a handy baking tool. Compact, not afraid of heat and cold, it is easy to get baked goods and wash. Use paper cups for mini cupcakes as well.
  4. Put a piece of dough in the mold, filling two or three containers – it will increase from heating.
  5. When you are fiddling with the dough, turn on the oven to warm up. Do not place baked goods in a cold oven.
  6. Do not slam the oven door, move the grate or sheet on which the cake is standing – it may settle.
  7. Place dessert on the middle oven shelf for even baking.
  8. Do not leave ready-made muffins inside the pan. Choose recipes carefully in order to adequately cope with all the manipulations.
  9. Decorate your creation. The decor enhances the appearance of the baked goods and keeps them from hardening.

Are your buns, cakes and cookies still far from ideal? Don’t get discouraged, it’s never too late to learn the art of culinary. These simple life hacks will help you successfully prepare any dessert.

  1. Do not deviate from the recipe. The most important thing in preparing desserts, and especially baking, is to follow the recipe. Of course, no one denies that experimenting with ingredients is possible and sometimes even necessary. But only if you are sure of the final result. For example, adding honey to baked goods can make them less moist and airy. You don’t want to get such a dessert, do you? Therefore, when deciding to cook sweets, be sure to follow the sequence of actions and proportions. Try not to mix all the foods randomly. Otherwise, instead of a soft and porous dough, you will get a hard lump that no one will like.
  2. Sift flour. Most housewives treat this important stage of cooking negligently. And in vain! After all, it is the sifting of flour that mainly affects the structure of the baked goods, as well as how quickly it rises in the oven. Sifting flour allows baked goods to become more airy, as more air bubbles appear between the grains. Accordingly, the yeast in the dough begins to react faster. Do this before preparing your dessert. And if you have time, then generally sift the flour twice. So you will definitely be sure of the splendor and tenderness of the texture of your baked goods.
  3. Do not measure ingredients in glasses. When preparing desserts, almost every housewife uses an ordinary faceted glass as a weight meter. On the one hand, it is very convenient and in many recipes the weight of the ingredients is indicated in the glasses. But there is one nuance in this manipulation. Measuring ingredients with a glass is unreliable because different product weights may result. In addition, during the preparation process, you can make a mistake with the proportions, measuring half or a quarter of a glass by eye. If you want the perfect dessert, get yourself a kitchen scale. With them, you will be sure of the result of the work done.
  4. Choose your eggs correctly. Few people know, but eggs of different ages are required to create a certain type of confectionery. So, for example, for making ice cream, it is better to choose fresh eggs. But for making meringues, give preference to the old ones. Here it is quite logical that the question may arise: “How can this be done?” You can determine the age of chicken eggs using a regular bowl filled with water. Place an egg in a bowl and observe its behavior. If the egg falls to the bottom of the bowl, then it is fresh. If it rises with a blunt end up, it is older. But if it floats up on the surface of the water, then it is better to throw it away.
  5. Set aside special utensils for desserts. You cannot use the same utensils for the preparation of desserts, side dishes, meat and fish dishes. If you don’t want your baked goods to taste like salty foods and have distant aromas, separate kitchen knives, boards, and spatulas. And if there are not enough tools in the kitchen, be sure to purchase new ones, especially for desserts. This will prevent your sweet treats from becoming salty and smelling like other foods.
  6. Don’t forget about time. When you start making dessert, remember to keep track of the time. If the recipe says the biscuit should bake for 30 minutes, set the timer to 28 minutes. Stay close to the kitchen while the baked goods are in the oven. When you smell a pleasant aroma, check the baked goods. Trust your instinct more than the recipe, and this way you will definitely avoid the dessert sticking.
  7. Monitor the temperature of the oil. It turns out that butter with the wrong temperature can ruin almost any dessert. When using melted butter to make cakes and muffins, the dough will not be porous and will not rise well. Most often, oil at room temperature should be used for desserts, which, when pressed with your finger, will easily knead. But for making muffins and cookies, the butter must be completely different. For this test, it is important that the butter only melts slightly after being stored in the refrigerator. Otherwise, you will never be able to achieve a delicious golden crust.
  8. Use a different flour. Do not be limited to trivial ideas and use different types of flour for baking. Wheat flour makes excellent shortbread dough, and oatmeal makes delicious cookies and pancakes. A mixture of wheat and oat flour is very suitable for making cakes and biscuits. But buckwheat flour can give baked goods not only a special and aromatic taste, but also real benefits. Buckwheat flour can be safely used for making muffins, pancakes and pies. When choosing flour for baking, pay attention to its protein content. Flour with a higher protein content usually produces excellent baked goods and cakes. A product with a minimum protein content is best used for making fluffy cakes, pastries and cupcakes.
  9. Use quality parchment paper. If you are used to baking desserts directly on the baking sheet, rather change your habit. Use parchment paper. This will prevent the bottom and top of the dessert from scorching. In addition, this will allow you to avoid an unpleasant fate for a long time at the sink and wipe off the carbon deposits from the baking sheet. If necessary, you can even fold the parchment paper in half to keep it warm.

Homemade ice cream is incomparable to the commercial one containing milk, diluted with water, sweetened with cheap sweeteners and stuffed with synthetic flavors and stabilizers. An ice cream maker will make your life easier when making ice cream. Usually the volume of the mixture due to the air driven into it increases by 1.8–2 times (the more, the better the ice cream).

  1. When freezing, the ice cream temperature is brought to minus 14-15 ° C. The freezing time is different for different ice cream makers. When the ice cream is half frozen, it needs to be transferred to a plastic container and the process completed in an ordinary freezer.
  2. You can store homemade ice cream for about 1 month in a glass, plastic or metal container, covered with foil or a lid.
  3. You can do without an ice cream maker altogether, it is important only during the entire freezing time in the freezer (from 2 to 5 hours) every half hour to stir the whole mass in a metal dish with a dough spatula or mixer. In addition to an ice cream maker, you need special metal or glass bowls for whipping and freezing, as well as a form for a round ice cream – “ice bomb with a lid”. You can also successfully use a soufflé dish or regular round bowls. To stir the mass during the freezing process, you will need a wooden dough spatula. Storing ice cream requires plastic containers with tight lids.
  4. You can serve ready-made ice cream with sweet sauces, biscuits, waffles, crushed nuts, candied fruits, dried fruits and, of course, fresh fruits and berries.
  5. The options for homemade homemade ice cream are endless. Experimenting with the addition of certain ingredients, you can come up with your own unique varieties of ice cream, and no book can accommodate the possible ways of decorating this dessert.

A good dessert completes any meal with dignity, and this section contains recipes for treats that you will surely enjoy. Desserts are very diverse, including cakes, pies, soufflés and mousses; in turn, these dishes can have a wide variety of tastes – vanilla, caramel, cherry, peanut, apple, strawberry, chocolate.

  1. Features of baking. Measure all ingredients accurately and accurately. To get the required amount of flour, spoon it into a dry measuring cup and then smooth with a rectangular metal spatula. Do not shake the cup or bang it on a hard surface.
  2. Use a baking dish of the size indicated in the recipe. The wrong choice of shape will lead to the fact that the dessert burns at the edges or falls through in the middle.
  3. The temperature in the oven may vary depending on the model and manufacturer. Therefore, check the readiness of the dish in the ways indicated in the recipe.
  4. Features of the preparation of confectionery. Using a stirrer or two knives, grind the shortening, margarine (butter) and salt mixture, making sure the individual pieces are the size of a pea. Add the liquid (one tablespoon at a time), stir with a fork, so that the mass acquires the consistency of a dough.
  5. If the dough sticks to your hands, put it in the refrigerator for a while. The easiest way is to roll out the dough using a cloth-covered rolling pin and a piece of cloth. To do this, dust the rolling pin and cloth with flour, after which you can easily and quickly roll out the dough. A tough pie crust is often the result of using too much flour and too much effort in rolling the dough.
  6. Roll out the dough into a 3 mm thick circle; the diameter of the circle should be about 2.5 cm larger than the diameter of the mold at the edges. To shape the circle into shape, roll the dough lightly on a rolling pin. Then transfer the dough to the mold and unwind carefully. Gently press down on the dough with your fingers, being careful not to stretch it or leave scratches, otherwise the dough will shrink when baking.
  7. It is said that the crust of a pie is often “blind baked”; this means that the crust is cooked before the filler is placed. To prevent the crust from swelling during baking, you can place foil filled with beans or rice on top of the crust. Then bake until tender. Remove foil and weight; return crust to oven for finishing or chill before placing filler

Salad is a light, tasty and nutritious dish. Salads can be independent dishes or serve as a side dish for meat, fish or poultry. Both its taste and appearance depend on how the salad is prepared, and therefore it is worth following some simple rules for preparing salads.

  1. It is better to cook salads in glass, enamel or ceramic dishes.
  2. Vegetables for salad are cut there finer, the denser their tissue.
  3. All raw vegetable salads are best prepared just before serving, rather than beforehand.
  4. It is better to heat vegetables in a gentle way: either cook in a little water, or simmer in a little fat.
  5. It is better to cook potatoes, beets and carrots immediately before preparing the salad unpeeled, this way vitamin C is better preserved.
  6. Cooked vegetables should be stored unpeeled, and peeled immediately before preparing the salad.
  7. Products cooked for salad must be cooled. Do not mix warm foods with cold ones.
  8. Quick-frozen vegetables need to be cooked without defrosting for 10-15 minutes.
  9. For dressing salads, in addition to sour cream and mayonnaise, vegetable oil is used in pure form or mixed with vinegar, salt, sugar and pepper. To give different flavors, mustard, a variety of hot and tomato sauces are added to salad dressings.
  10. Sauces and condiments not only improve the flavor of the salad. The fat in them protects vitamins from destruction. Salt should be salted before serving, and vegetable oil is added to the salad only after it has been salted, vinegar and pepper have been added.
  11. Salad should be seasoned with mayonnaise or sour cream just before meals.
  12. Ready-made salads are transferred from the bowl in which it was seasoned to clean salad bowls, trying not to stain the edges of the dishes, and decorated with herbs or decorations cut from the products that make up the salad.

Few of us dislike desserts. Today we will tell you the secrets of making the most delicious desserts! 🙂

  1. Brush the dough with egg yolk for about 5-10 minutes. before baking.
  2. When whisking the egg white, be careful not to get the yolk on it, as this will make whipping difficult.
  3. Bake small items at a high temperature, large and thick cakes at a lower temperature, but for a long time, so the whole dough will bake well.
  4. The readiness of large pies can be seen by the bottom crust: in the finished product it will be ruddy and will easily separate from the sheet.
  5. The product will feel soft (top and bottom crust) if covered with a cloth while it is still hot.
  6. There are three types of baking temperatures: moderate (130-180 ◦ C), medium (180-220 ◦ C), high (220-270 ◦ C). The temperature in the oven depends on the type of dough, the size and shape of the product.
  7. For frying donuts, pies and other similar products, the fat temperature should be 170-180 ◦ C.

I think we all would like to be able to cook delicious desserts?) We have selected some important tips for you for their preparation!

  1. Peeled apples will not darken if you put them in water to which you have added lemon juice.
  2. If the nuts are kept in the oven hot for 15-20 minutes, it will be easier to peel them from the shell and the taste will be softer.
  3. To squeeze more juice out of the lemon, it must be kept in hot water for 5 minutes and the zest will not taste bitter.
  4. If an open jar of jam is sprinkled with sugar sand on top, then it will be stored longer.
  5. Dried apricot pits replace almonds.
  6. To prevent the peel of baked apples from bursting, you need to make several punctures in the peel before baking or bake them in foil.
  7. If gelatin is added to fruit puree when making marmalade, then the transparency, taste and aroma of marmalade are lost.
  8. To turn 10% of cream into 30%, one third of their volume must be evaporated in a water bath.
  9. To prevent lumps from forming in the jelly, it must be poured into a heated bowl to solidify.

The successful preparation of any dish often depends on thoughtful organization and accurate execution of all operations. First of all, you should carefully read the recipe and all instructions; then collect all the ingredients and equipment. You should not make any substitutions in ingredients unless specifically noted in the text; in case of unjustified replacement, the taste balance may change and you will get an unsatisfactory result. Following the guidelines below will help you master the skills of making desserts and, to some extent, will guarantee success.

  1. How to beat egg whites. The easiest way to separate the white from the yolk is when the egg is chilled. However, the whites reach their greatest volume if they stand at room temperature for 30 minutes before whipping.
  2. When whisking the egg white, make sure the bowl and whisk are clean and dry. A small amount of yolk, water, or fat will prevent the whites from beating to their maximum volume. A stainless steel or glass bowl is recommended (plastic bowls may have an oily film even after rinsing repeatedly).
  3. Beat the whites slowly at first, until they acquire a frothy consistency; then increase the speed. Add a pinch of salt and citric acid diluted with water to stabilize the result. Do not beat for too long, otherwise the whites will dry out and become lumpy.
  4. You can beat the whites until you want them. If, for example, you want to get soft peaks after removing the whisk, then a sign of this consistency would be a decrease in peak heights while maintaining them. If you want to get the consistency of hard peaks, then their sign will be the preservation of height and shape.
  5. Transfer the squirrels to another dish immediately, otherwise a delay in time will lead to a decrease in their volume. After that, you cannot whisk the mixture or stir in the usual way. The term “stirring” should be understood as “stacking the layers”.
  6. Dissolving gelatin. Gelatin is used at the rate of 4 g per 100 g of liquid. It is first soaked in plenty of cold water. When the grains become transparent, the gelatin is thrown on a sieve and allowed to drain off the water, then combined with a warm liquid, stir well, bring to a boil, but do not boil.
  7. Whipping cream. First of all, you need to chill the cream, bowl and whisk: the cold keeps the fat solid, so the cream takes on a large volume.
  8. For optimum volume, whip the cream in a deep, narrow bowl. As practice shows, 1 cup of 25-30% cream should yield 2 cups of whipped. Whisk until soft peaks form. To check if the desired consistency has been achieved, remove the beater: the height of the peaks should decrease, but the peaks themselves are still preserved. Do not overdo it or the cream may turn into butter.

In the preparation of delicious salads, like any other dish, there are tricks and tricks. To list them all, one page of the site is definitely not enough. A whole book could be written about this. Therefore, I tried to choose only the most basic and useful. Hope these salad dressing tips come in handy for beginners and seasoned chefs alike.

  1. For the preparation of salads, you can use any vegetables – boiled, fresh, salted, pickled, and fruits – fresh, dried, canned. Boiled meat, ham, sausage, eggs are used in meat salads.
  2. Serve salads, especially for the festive table, should be beautifully and neatly laid. To do this, place them in a salad bowl or on a dish without pressing or smoothing the surface.
  3. You need to decorate the salad sparingly so that you can see what it consists of.
  4. If there are several salads on the table, do not decorate them the same way. Show your imagination and your table will amaze with a variety of dishes.
  5. There are different types of salad serving. In a salad bowl, on a platter, in separate portions in small salad bowls, on slices of bread. They are stuffed with other vegetables, such as tomatoes and cucumbers. They are placed in shortcrust pastry baskets or on slices of fried boiled sausage. In some cases, they even make baskets of vegetables, fastening their slices with gelatin at the base.
  6. In no case should you salt and season the salads in advance – they will give juice and spoil quickly, which can lead to poisoning. Do this before serving.
  7. To prevent the apples for the salad from darkening, immediately after peeling and slicing, put them in cold water for 10 minutes.
  8. To prevent the skins of potatoes “in their uniforms” from cracking, pierce each tuber with a fork in several places before cooking.
  9. For dressing tomato salad, it is better to use lemon juice rather than vinegar.
  10. Mayonnaise for salad can be replaced with sour cream by adding pounded egg yolk and a teaspoon of mustard to it.

Burger! And if your mouth is full of saliva now, it’s time to learn the secrets of making the most delicious grilled burgers.

  1. Any soft-baked product that can be cut into two parts: a lid and a bottom are suitable as a “burger bun”. Ideally, the bun should be slightly sweet. And experts also recommend not to take buns with a crispy crust and an excessive content of all kinds of bran.
  2. Before folding the burger, grill the halves of the bun. If you don’t do this and put the cutlets on the bun right away, the bread will absorb the meat juices and the burger will fall apart.
  3. The burger must have a vegetable filling. The classic assembly scheme: green salad, tomatoes, onions (fresh or fried), fresh or pickled cucumbers. But, in principle, you can add other vegetables (bell peppers, zucchini, and eggplant).
  4. Traditionally, a hamburger is not complete without ketchup and yellow mild mustard. BBQ and chili sauces are also commonly used. Less often, cheese sauces and mayonnaise are added.
  5. If you’re making burgers for the company, you can put patties, buns, and filling ingredients on the table so everyone can make a burger to their liking.
  6. And no cutlery! Burgers are eaten only with hands.